【UE4】Object Space Raymarching (Material Editor) メタボール編
はじめに
こちらは前回の記事「UE4 (2.44.3) Object Space Raymarching」の続きとなります。
メタボールとなる為に、どのような追加実装をしたのかを記録しています。
※前回の記事のおまけの Local Space はせず、World Spaceでの計算のものです。
目次
メタボールとは
オブジェクト同士が近づくとスライムのように結合する表現で、液体のような物体を表現する技法です。海外では Blob Mesh と書かれていることが多い気がします(gccツールや英語記事等)。
オブジェクトが2つ以上あってのメタボール表現なので、アクターが複数必要にあります。なのでまずはレベル上にアクターをたくさん置きます。
アクターを複数設置
今回は5つ程のアクターを配置しました。動きがあっての表現なので、適当に動くコンポーネントも作り、アタッチしておきます。UPingPongComponent というクラスを作ってみました。
// UPingPongComponent.h
#pragma once

#include "CoreMinimal.h"
#include "Components/ActorComponent.h"
#include "PingPongComponent.generated.h"

UCLASS( ClassGroup=(Custom), meta=(BlueprintSpawnableComponent) )
class RENDERING_API UPingPongComponent : public UActorComponent
{
    GENERATED_BODY()

public:
    UPingPongComponent();

    virtual void TickComponent(
        float DeltaTime,
        ELevelTick TickType,
        FActorComponentTickFunction* ThisTickFunction) override;

public:
    UPROPERTY(EditInstanceOnly, Category="Pingpong")
    FVector speed;

    UPROPERTY(EditInstanceOnly, Category="Pingpong")
    float distance;

    UPROPERTY(EditInstanceOnly, Category="Pingpong")
    FVector center;

private:
    float time;
};
// UPingPongComponent.cpp
#include "PingPongComponent.h"
#include "GameFramework/Actor.h"
#include "Kismet/KismetMathLibrary.h"

UPingPongComponent::UPingPongComponent()
{
    PrimaryComponentTick.bCanEverTick = true;
}

void UPingPongComponent::TickComponent(
    float DeltaTime,
    ELevelTick TickType,
    FActorComponentTickFunction* ThisTickFunction)
{
    Super::TickComponent(DeltaTime, TickType, ThisTickFunction);

    AActor *actor = GetOwner();
    this->time += DeltaTime;

    FVector offset;
    offset.X = FMath::Sin(this->speed.X * this->time);
    offset.Y = FMath::Sin(this->speed.Y * this->time);
    offset.Z = FMath::Sin(this->speed.Z * this->time);
    actor->SetActorLocation(offset * this->distance + center);
}
アクターの情報収集の準備
「アクター同士が近い」という情報を Material Editor 側に伝えるために、全てのアクター情報を収集します。Material へは StructuredBuffer といったデータ配列を渡すことが出来ないようですが、Texture は渡すことが出来るようなので、Texture に必要情報を書き込み Material Editor で Texture から情報をピックアップする方法で無理やり渡します。
まずは収集しやすいように、各アクターに Tag を設定します。Tag は "MetaballObject" と設定します。
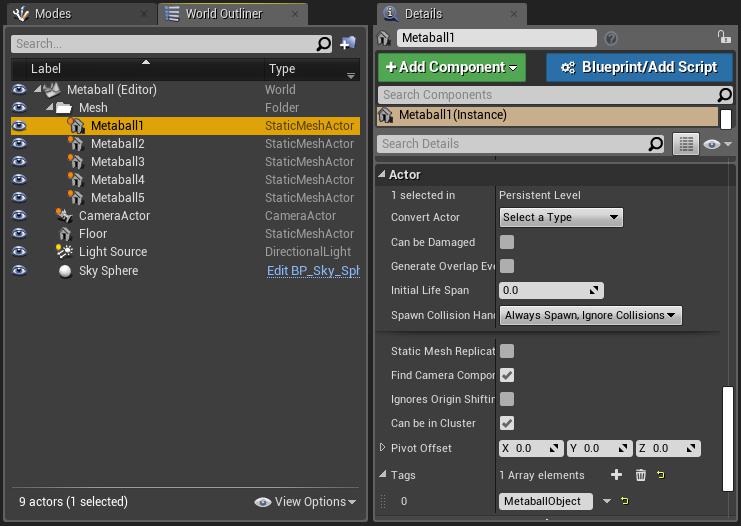
設定が完了したら、C++側でアクター情報を収集していきます。UTransformTextureWriterクラスを作成します。
// UTransformTextureWriter.h
#pragma once

#include "CoreMinimal.h"
#include "Components/ActorComponent.h"
#include "TransformTextureWriterComponent.generated.h"

UCLASS( ClassGroup=(Custom), meta=(BlueprintSpawnableComponent) )
class RENDERING_API UTransformTextureWriterComponent : public UActorComponent
{
    GENERATED_BODY()

public:
    UTransformTextureWriterComponent();

    UPROPERTY(EditAnywhere, AdvancedDisplay, Category=TransformTexture)
    class UMaterial* material;

protected:
    virtual void BeginPlay() override;
    virtual void EndPlay(const EEndPlayReason::Type EndPlayReason) override;

public:
    virtual void TickComponent(
        float DeltaTime,
        ELevelTick TickType,
        FActorComponentTickFunction* ThisTickFunction) override;

private:
    TArray<AActor*> actors;
    UTexture2D* texture;
    UMaterialInstanceDynamic* materialInstance;
};
#include "TransformTextureWriterComponent.h"

UTransformTextureWriterComponent::UTransformTextureWriterComponent()
{
    PrimaryComponentTick.bCanEverTick = true;
}

void UTransformTextureWriterComponent::BeginPlay()
{
    Super::BeginPlay();
}

void UTransformTextureWriterComponent::TickComponent(
    float DeltaTime,
    ELevelTick TickType,
    FActorComponentTickFunction* ThisTickFunction)
{
    Super::TickComponent(DeltaTime, TickType, ThisTickFunction);
}

void UTransformTextureWriterComponent::EndPlay(const EEndPlayReason::Type EndPlayReason)
{
    Super::EndPlay(EndPlayReason);
}
まだクラスの実装は空っぽの状態です。予め使用する変数やイベント関数は定義していますので、これから埋めていきます。
まずは BeginPlay() でアクターを取得しましょう。
集めやすいように Tag を割り振ったので1行で済みます。
#include "Kismet/GameplayStatics.h"
...
void UTransformTextureWriterComponent::BeginPlay()
{
    // ワールドに存在するタグ付きのアクターを取得 (TArray<AActor*> actors)
    UGameplayStatics::GetAllActorsWithTag(this->GetWorld(), "MetaballObject", this->actors);
次に、Material Editor へ渡すためのテクスチャを作成します。
...
if(0 < this->actors.Num())
{
    int width= this->actors.Num();
    this->texture = UTexture2D::CreateTransient(width, 1, PF_A32B32G32R32F);
    ...
Material Editor へ渡す情報は…
- Actor の World Position(Vector3 ⇔ float3)
- this->actors 配列のインデックス(形状のタイプとかインデックス毎に変えたいので必要)
なので、ちょうど PF_A32B32G32R32F のフォーマットの float 32bit ARGB(Vector4 ⇔ float4)のサイズで収まりそうです。テクスチャサイズも横幅だけアクターの数を指定します。1つのアクターにつき1ピクセルに収まっているので情報を取り出すのも簡単そうです。
テクスチャを作成したので、解放する処理を EndPlay に書きます。
void UTransformTextureComponent::EndPlay(const EEndPlayReason::Type EndPlayReason)
{
    this->texture->ConditionalBeginDestroy(); // ←ここ
    Super::EndPlay(EndPlayReason);
}
アクターの情報のテクスチャをマテリアルに設定
まずはC++クラスにマテリアルを渡します。渡す準備は UTransformTextureWriter.h に予め施してあるので、UE4 Editor 上で Raymarching するマテリアルを設定しましょう。
まず 「空のアクター(Empty Actor)」をレベル上に配置し、 UTransformTextureWriter をアタッチします。前の記事で作成した ObjectSpaceRaymarching.uasset マテリアルを複製し、ObjectSpaceRaymarchingMetaball と命名します。そのマテリアルを、DetailウィンドウにてUTransformTextureWriter > Material に設定します。
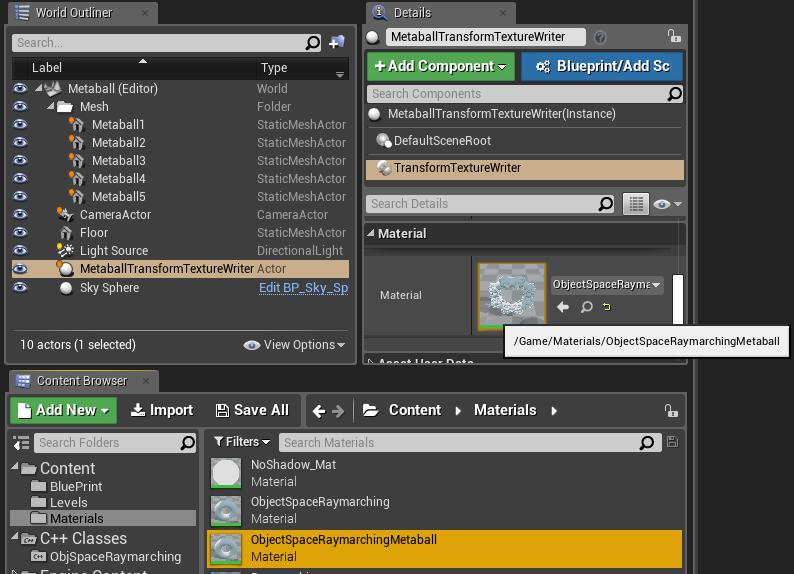
今回テクスチャは動的に生成しているので、C++側でテクスチャをマテリアルに設定します。まずはその受け取り口を Material に追加していきます。TextureObjectParameter ノードを置き Parameter Name を "MetaballBuffer"、ScalarParameter ノードを置き Parameter Name を "ActorsNum"とします。

※どこかのノードに繋がないと無いものとされてしまうのでDummyに繋ぎます
早速設定したいところですが、その前にマテリアルをインスタンスする必要があります。これは実行時に個別にパラメータを変更する為です。C++ 側で BeginPlay() のテクスチャ作成後に処理します。
this->materialInstance = UMaterialInstanceDynamic::Create(this->material, nullptr);
インスタンスしたので、忘れず解放処理を EndPlay に書きます。
void UTransformTextureComponent::EndPlay(const EEndPlayReason::Type EndPlayReason)
{
    this->texture->ConditionalBeginDestroy();
    this->materialInstance->ConditionalBeginDestroy(); // ←ここ
    Super::EndPlay(EndPlayReason);
}
BeginPlay() に戻って、先程インスタンスしたマテリアルにテクスチャを渡します(バインド)。
...
// マテリアルにテクスチャをバインド
this->materialInstance->SetScalarParameterValue(FName(TEXT("ActorsNum")), this->actors.Num());
this->materialInstance->SetTextureParameterValue(FName(TEXT("MetaballBuffer")), this->texture);
そして、インスタンスしたマテリアルを各アクターの Static Mesh Component に設定していきます。
...
// 各アクターのStaticMeshComponentのマテリアルを差し替える
for(int i=0 ; i<this->actors.Num() ; ++i)
{
    auto actor = this->actors[i];
    auto component = Cast<UStaticMeshComponent>(
            actor->GetComponentByClass(UStaticMeshComponent::StaticClass()));

    if(component != nullptr)
    {
        for(int32 k=0 ; k<component->GetNumMaterials() ; k++)
        {
            component->SetMaterial(k, this->materialInstance);
        }
    }
}
ほとんど準備が整いました。あとはテクスチャに座標を入力していくだけです!
アクターの情報をテクスチャに書き込む
TickComponent() で毎フレームのアクターの座標をテクスチャに書き込んでいきます。マテリアルは既にバインド済みなので、テクスチャが変更されれば自動的に Material Editor へも情報が伝わります。
#pragma optimize("", off)
void UTransformTextureWriterComponent::TickComponent(
        float DeltaTime,
        ELevelTick TickType,
        FActorComponentTickFunction* ThisTickFunction)
{
    Super::TickComponent(DeltaTime, TickType, ThisTickFunction);

    // 座標更新
    if(this->texture != nullptr)
    {
        // テクスチャに書き込む用のバッファを取得
        volatile float* mappedPtr = (float*)this->texture->PlatformData->Mips[0].BulkData.Lock(LOCK_READ_WRITE);

        // テクスチャに各アクターの座標を書き込む
        for(int i=0 ; i<actors.Num() ; ++i)
        {
            FVector position = actors[i]->GetTransform().GetLocation();
            *mappedPtr = position.X; mappedPtr++; // R
            *mappedPtr = position.Y; mappedPtr++; // G
            *mappedPtr = position.Z; mappedPtr++; // B
            *mappedPtr = i; mappedPtr++; // A
        }

        // テクスチャのアンロック
        this->texture->PlatformData->Mips[0].BulkData.Unlock();
        this->texture->UpdateResource();
    }
}
#pragma optimize("", on)
コンパイルの最適化で無駄な処理ではないと訴えるために、 #pragma optimize で防いでいます(地雷を踏みました)。内容は書くまでもないかと思いますが、テクスチャをロックして書き込み用ポインタを受け取り、書き込んだらアンロックしてアップデートしています。
これで Material Editor へ全てのアクターの座標を渡すことが出来ました。
Map カスタムノードの変更
ちゃんと Material Editor に正しく座標が送られているか表示してみます。
Texture から Actor の座標を取得し、その位置に Raymarching で Torus を表示してみます。Map カスタムノードを下記のように変更します。
float dist = 1e+4;
float actorsNum = Material.ScalarExpressions[0].x;
float xOffset = 1 / actorsNum * 0.5;
float yOffset = 0.5;

for(int k=0 ; k<actorsNum; ++k)
{
    float2 actorUV = float2(k / actorsNum + xOffset, yOffset);
    float4 actorPos =  Texture2DSampleLevel(Material.Texture2D_0, Material.Texture2D_0Sampler, actorUV, 0);

    float3 spPos = rayPos - actorPos;
    float2 spTorus = float2(length(spPos.xz) - 50.0, spPos.y);
    float spDist = length(spTorus) - 20.0;

    dist = min(dist, spDist);
}

return dist;
xOffset と yOffset はピクセルの中心をピックアップするようにオフセットをかませています。これがないと テクスチャのフォーマットやWrap表現の設定次第で隣のピクセルとグラデーションされた数値が返ってきてしまいます。
さりげなく記述されている Material.ScalarExpressions[0].x は Scalar Parameter ノードの ActorsNum の数値です。又、Material.Texture2D_0 や Material.Texture2D_0Sample も同様に Texture Object Parameter ノードの MetaballBuffer のことです。Map 関数は引数を rayPos だけにする制限があり、ノード引数を拡張できない為、このような形で情報を受け取っています。
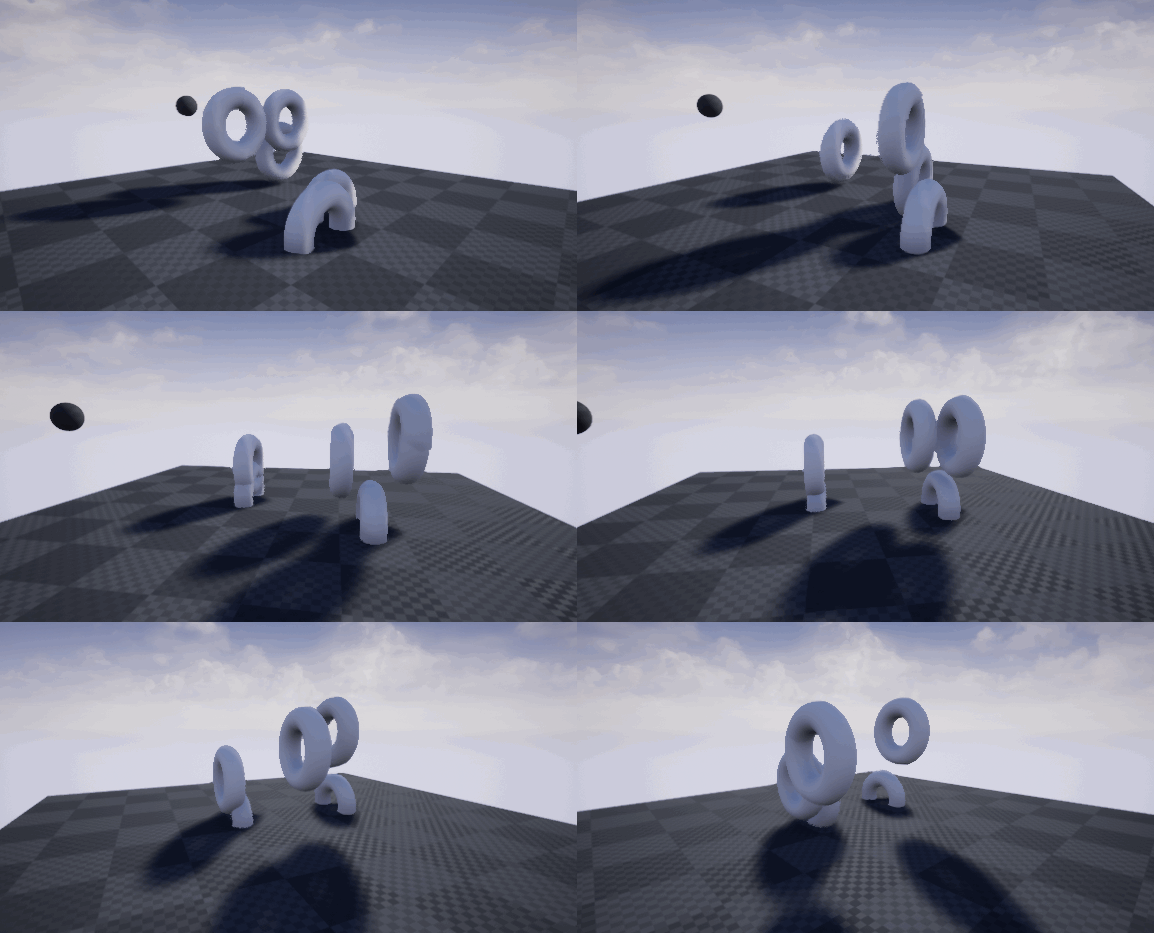
実際にPlayしてみると、ちゃんとアクターの位置に正しく表示されております。
メタボールの実装
ここからは通常の Raymarching の実装になります。 Raymarching で Metaball のような表現をする際は、距離の合成でうまいことやります…というより先駆者様のお力を頂きます。
www.shadertoy.com
float2 spTorus = float2(length(spPos.xz)-50.0, spPos.y);
float spDist = length(spTorus) - 20.0;

float r = 50.0;
float a = dist;
float b = spDist;
float e = max(r - abs(a - b), 0);
dist = min(a, b) - e*e*0.25 / r;
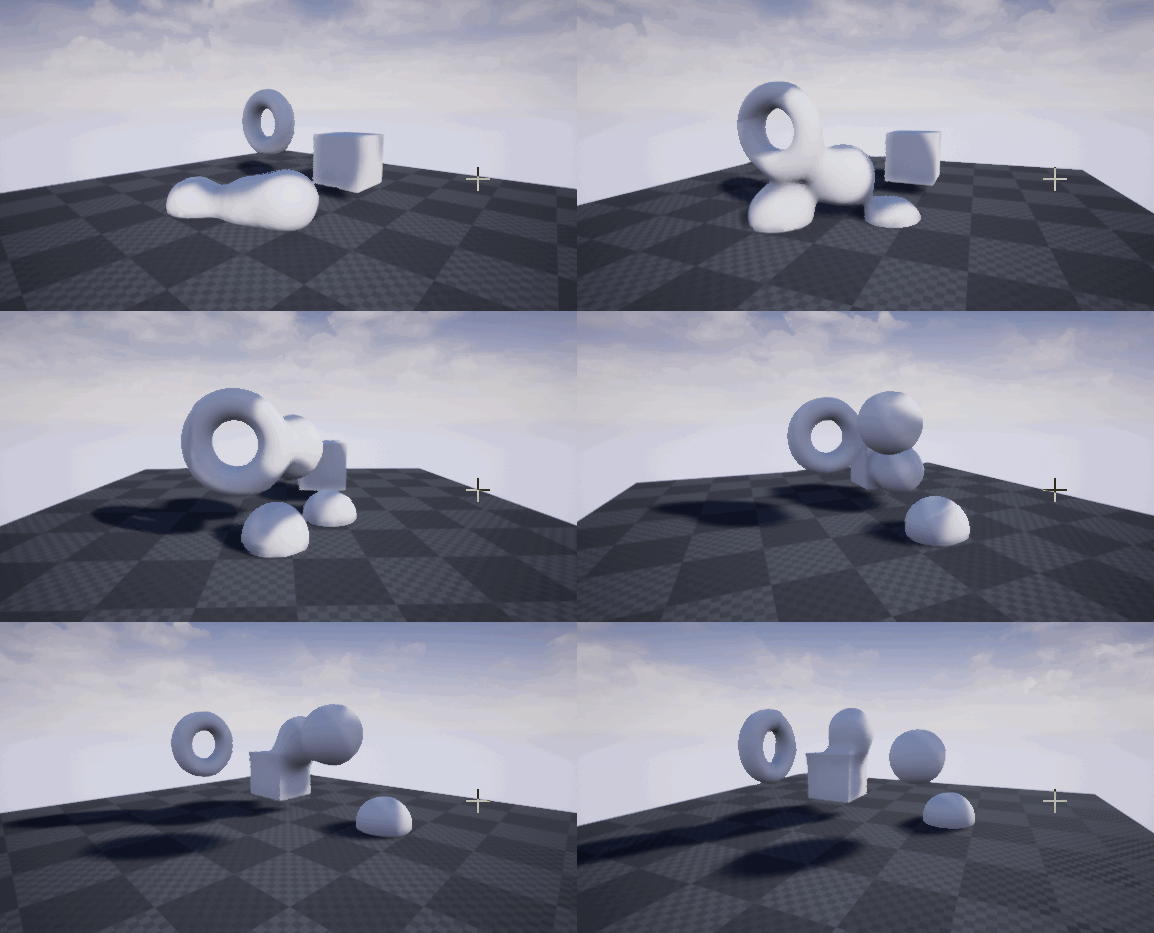
タイプ毎に形状を変える
アクターのインデックスを渡していたので、インデックスに合わせて形状を変えていきます。各形状の計算式は同じく先駆者様のお力を頂きます。
iquilezles.org
int spType = actorPos.w; // C++側でA値にインデックスを入れています
float3 spPos = rayPos - actorPos;
float2 spTorus = float2(length(spPos.xz) - 50.0, spPos.y);
float3 spBox = abs(spPos) - 50;

float spDist = 0.0;
spDist += (spType < 3) * (length(spPos) - 50);
spDist += (spType == 3) * (length(spTorus) - 20);
spDist += (spType > 3) * (length(max(spBox, 0)) + min(max(spBox.x, max(spBox.y, spBox.z)), 0));
テクスチャを貼る
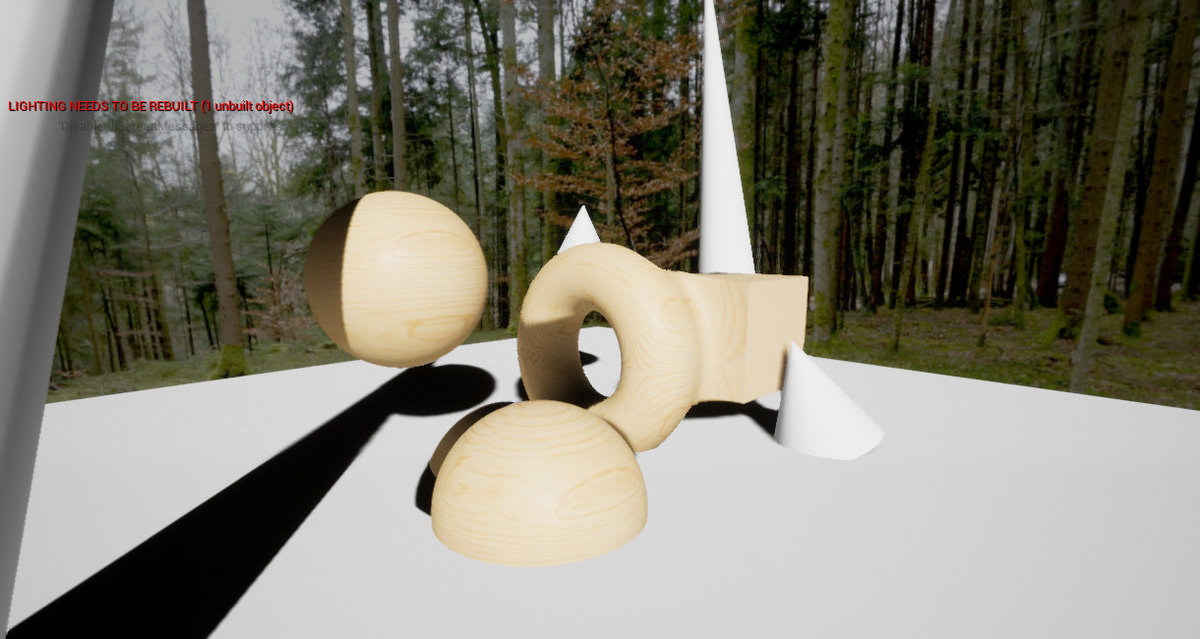
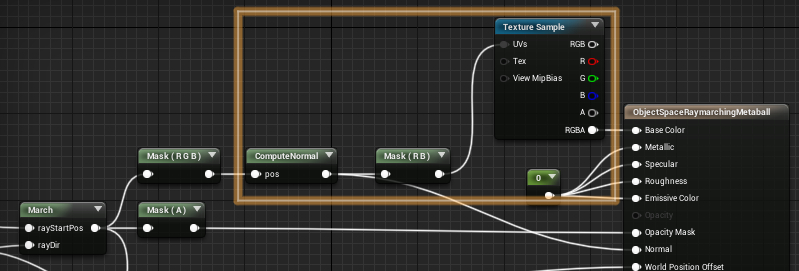
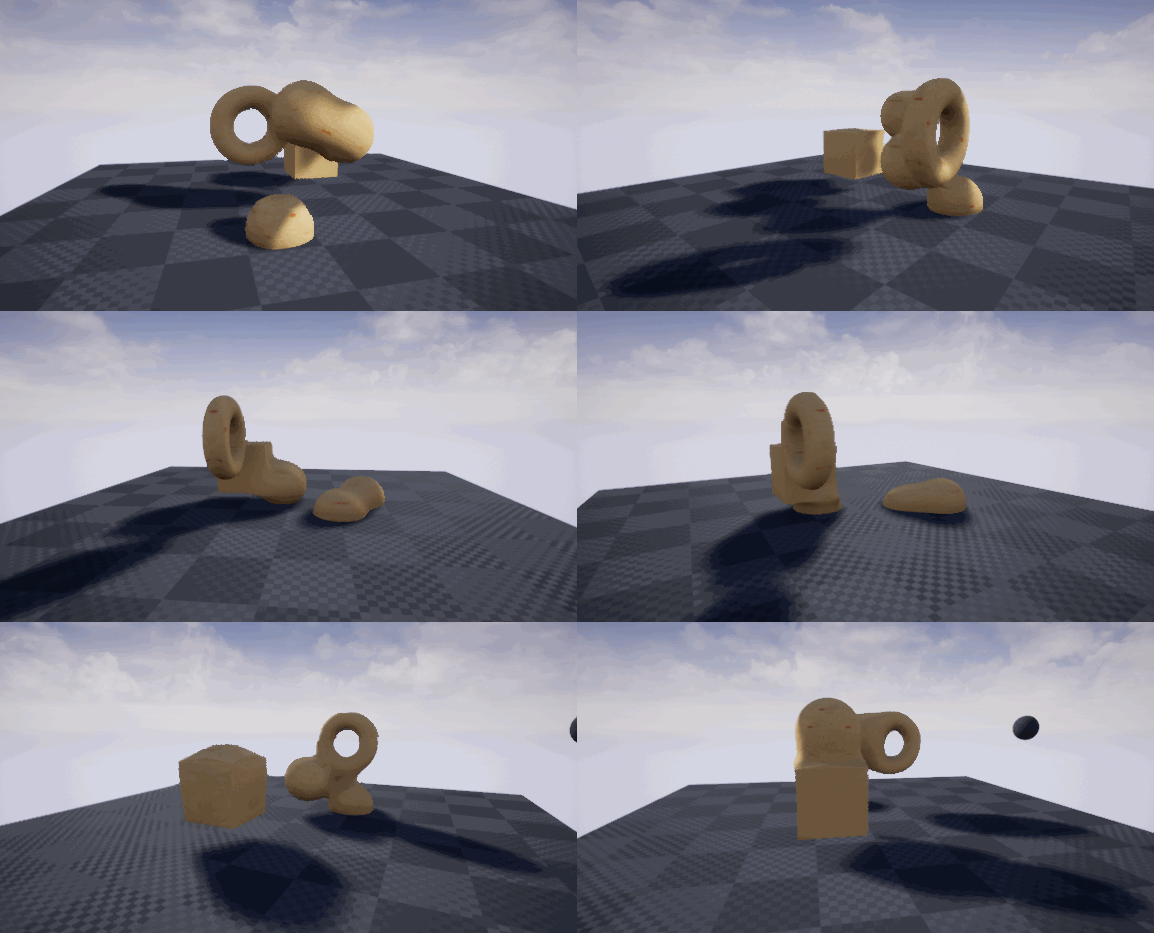
大分適当ですが、法線情報をそのまま貼っています。なので Box は正しく表示されません。
まとめ
前回の記事で沢山の地雷を踏んでいたので、本記事はさほど複雑にはなりませんでした。今回は「Material に Buffer って渡せるの?」という疑問から作られたものなので、Texture を書き込んで渡すというところが肝でした(もしかしたら GetPrimitiveData(Parameters.PrimitiveId) からすべての情報が取れたかもしれませんが…)。
全体を通して言うと、UE4 で Raymarching はやりずらいなと思いました…。ただこれを書いていて思ったのが、影さえ何とかなればイケそうだったので、カスタムシャドウマップを自前でやるというのも今度やってみようと思います。(そうであればUE4のデフォルトのカスケードシャドウは止めたい…情報求ム…)